Showing posts with label Crafty Wednesday. Show all posts

Wednesday, September 26, 2018

Crafty Wednesday {September craft night}

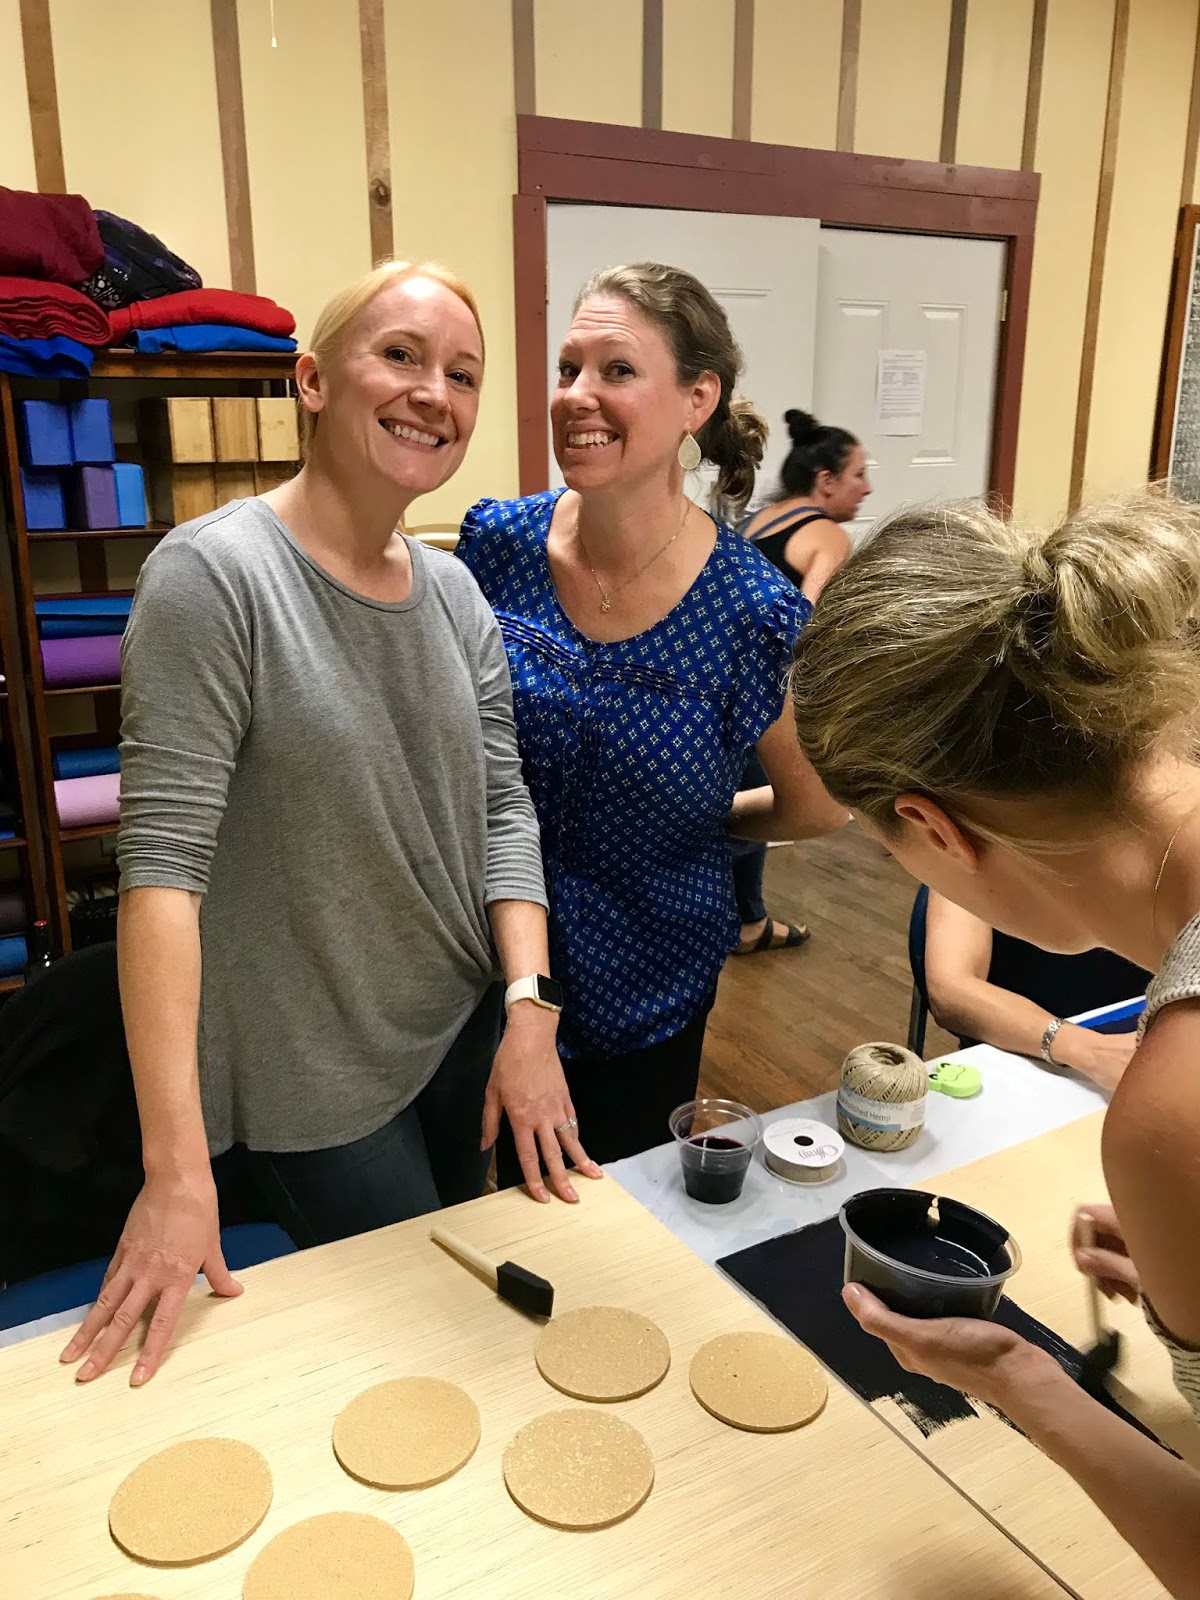
I own a small craft business called Branch and Bloom with my best friend Rachael.  Once a month we host a craft class and teach people how to do a craft.  We took a couple of months off for the summer and we had our first craft class of the fall last week.  For our September craft night we hosted a private craft class for our dear friend Faith and some of our friends.  Faith really wanted to do an organization station so we worked hard to come up with something that would be simple and fun for our friends to do.  


This is what we came up with.  We provided each person with a 2 foot x 2 foot board, chalkboard paint, ribbon, jute, and corkboard tiles.  We had everything set up when everyone came in for the class.  We set up each person with their own little station.  


Here is the birthday girl hard at work on her craft. 


 The first step we had people do was to paint their board with chalkboard paint. Some people wanted their board completely covered with chalkboard paint, some people used painters tape and taped off sections of their board.  We wanted people to use their creativitiy and make this project their own.  It was neat seeing all of the designs that everyone came up with.


After their chalkboard dried then they add on the corkboard circles.  The circles were a big hit! 

The most important things for us at our Craft Nights is that 1.everyone  leaves with a completed craft and 2. everyone has a good time.  Faith's birthday craft was so fun!  Everyone had a good time and everyone left with their own organization station.  If you would like a craft class for a birthday party please let us know!


Happy Wednesday!  Now that things have calmed down for me I hope Crafty Wednesday posts every week so check back.

xoxo


Wednesday, June 27, 2018

Crafty Wednesday {Vodka Infusions}

Last Thursday Rachael and I hosted our last craft night until fall.  We held it at a bar/supper club in our town and had 20 people.  We did two crafts.  We made vodka infusions and people got to hand paint their own shot glasses. I did the vodka infusions part and Rachael taught people how to hand paint their shot glasses.


There are a TON of recipes out there for vodka infusions. I did quite a bit of research on them while preparing for this class and I'll list my top tips below.  We wanted to use in season fruits and vegetables for this class so we choose three infusions using mostly in season ingredients. People could choose the one they wanted to do.

The three we had at the class were

Strawberry Rhubarb-mix strawberries and rhubarb using a one to one ratio

Bloody Mary-mix tomatoes, garlic, onion, celery, lemon, fill and peppercorns to your personal preference

Cucumber Mint-mix cucumber and mint using a four to one ratio

We used these bottles from SKS glass.  We got the larger 750 ML size but you could also get the smaller size for this project.


You want about two inches of fruit/vegetables at the bottom of your jar. I just love the bottles we got but honestly if we do this craft again we will just get mason jars because after a few days your vodka is infused and you will need to empty out all of the fruits, vegetables, etc from your bottle. These bottles are pretty but getting rid of all the organic stuff from your bottle would be so much easier with a Mason jar.

I first learned to make infusions when I went to the Beekman Boy's Christmas class last November.  Since then I have been really interested in making them and seeing what kind of different flavors you can mix together. 

 Some of the ladies that come to our class don't drink so we had them do the strawberry rhubarb or cucumber mint infusion and just add water. I made a mint and cucumber one for myself and it was delicious.   Flavored water is great for a party! 

 Everyone had a blast!  We have found that people just love to get together and create something that they made.  It always makes us so happy when people come to our craft nights and have a good time.  


If you decide to make your own infusions here are some notes that have helped us--

1.  Don't take too much, think about how much you'll drink or need for a party and make that amount.
2.  You need to shake your infusion twice a day and taste it once a day.
3.  Most flavors take 4-7 days to infuse but make sure you taste it daily to get the taste that you want.
4.  Alcohol is very good at extracting flavors from herbs, spices, fruits and vegetables.  It takes a lot less time than you think for an ingredient to flavor your vodka
5.  You must strain everything out of your vodka.  Because overtime those stay bits of fruits, herbs etc will create an off taste with your vodka.
6.  You can store your infusion at room temperature or in the fridge.  
7.  Don't eat your fruits or vegetables after they infuse your vodka they will taste awful...trust me!!

Let me know if you try infusing your own vodka or water!  I

Happy Wednesday.
Xoxo


Wednesday, May 16, 2018

Crafty Wednesday {Sugar Scrubs}

Last Friday we had our monthly craft night for Branch and Bloom.  This month we made sugar scrubs.  They were a big hit and I'm going to show you step by step how to make your own organic sugar scrubs.  In our class we made 3 different kinds and we put our scrubs in 8 ounce canning jars.   My friend Rachael is the sugar scrub queen and she taught the class.  I helped her and took pictures for our Facebook page.  


We always like to set up the room before everyone gets there. We like each person to have their own supplies in front of them and an instruction list so they can do the craft at home.


Usually we have about 20 people at our Craft Nights however this one was a little smaller and we had 10 people come this month.  10 was perfect for our Sugar Scrubs though because they were messy!  People had the instructions when they sat down and they got right to work making their scrubs. 


Everyone had a great time working on their scrubs.  


We always take a picture after our class with our participants and their finished projects.  I love this little tradition of ours!


Ok here are the recipes for the three scrubs.  We made a...

Lavender and Rosemary Foot scrub
Coffee and Cinnamon cellulite reducing scrub
Lemon and Mint Body Polish

Lavender and Rosemary foot scrub
1.25 cup organic cane sugar
.25 cup avocado oil
8-10 drops lavender essential oil
1-2 drops rosemary oil
pinch of dried lavender
mix well  and store in mason jar

Coffee and Cinnamon cellulite reducing scrub
1 cup brown sugar
.25 cup coffee
.25 cup coconut oil
1 T cinnamon
mix well and store in mason jar

Lemon and Mint body polish
1.25 cup mix (organic cane sugar and ultra fine cane sugar)
1/4 cup avacado oil
8-10 drops lemon essential oil
1-2 drops mint essential oil
dash dried mint
dash lemon zest

If you try making these let me know which one is your favorite.  My personal favorite is the lemon and mint body polish.  A lot of people in our class like the coffee and cinnamon one.  

Happy Wednesday!
Xoxo 

Wednesday, May 2, 2018

Crafty Wednesday {Hanging Chalkboard Planters}

Three Friday's ago  my friend Rachael  and I had our monthly craft night for our business Branch and Bloom.  We made adorable hanging chalkboard planters and they are so easy to make and I'm going to show you how to do it step by step.    We charged $10 extra for this craft night and did a fundraiser for our local library.  We were able to raise $120 for them!  We are always so happy to do fundraisers and help local organizations.  

Here is the completed project hanging in our dining room.


I have started this post every Wednesday since our craft night but April/May are super hectic for me with my job and end of year reports, activities, events, etc. so I haven't found any time to post lately.  I am hoping that changes when summer comes!!

Anyway back to Crafty Wednesday!  This craft night was a fundraiser for a tiny country library about 10 minutes away from where we live. The library is in the back of an historic home.  They had to build a new room to keep all the books in because the weight of the books was too heavy for the historic home.  I loved the shelf of new releases they had.


We did our craft night in the front rooms of the library.  Before everyone got there Rachael and I set up a station for each person with all of the supplies and an instruction sheet for each person.  We always include an instruction sheet in case people want to make another craft at home.


Step #1 is painting the board with chalkboard paint.  Our boards were two feet long and 5 inches wide.   We had people do three coats of chalkboard paint.  We had them use blow dryers to dry their project between coats to speed up the drying process.  Also people had wine and snacks while waiting on their chalkboards to dry.  People always love snacks :)


Step #2 is seasoning the chalkboard with chalk.  We had people rub the side of a piece of chalk all over their chalkboard to season it.  Seasoning helps prevent chalk marks from staying on your chalkboard after you erase.  If you don't season your chalkboard faint marks of what you have written will always stay on your board.   Here you can see the lady on the left seasoning her chalkboard.  


Step #3 after the chalkboard is completely dry you can add your metal pails.  We ordered our metal pails from amazon.  We got the large size-they were 5 inches tall and 4.5 inches in diameter.  We punched a small hole in the top of each pail with a nail and then used a screwdriver to screw the pail to the chalkboard.  The metal is very thin so it's easy to punch a small hole in. 


Step #4  enjoy your finished product!!  I loved seeing the variations that people did.  I did the sample for the class vertically and I liked it so much I hung it in our dining room.  


Everyone loved their finished projects!!  It was a great night and I am so happy that we were able to do a fundraiser for the hospital.

Happy Wednesday!
Xoxo


Wednesday, March 21, 2018

Crafty Wednesday {March Craft Class}

I own a small craft business called Branch and Bloom with my friend Rachael.   Once a month we have a craft class and teach people to make a craft.  We try and choose crafts that take about an hour to complete.  People come with their friends and have a good time while creating a craft to take home.  We provide all of the supplies and give them step by step instructions at our class so they can make a beautiful craft.  

Here are some of our past craft nights


This month we created reversible signs one side says Hey Spring and the other side says Hello Summer.  This class was also a fundraiser for an animal rescue group in our town so $10 from each person's ticket went to the animal rescue group.  We were so happy to be able to raise some money for them!!


We got our wood at Lowe's and had the boards cut down from 15 feet to 5 feet lengths.  I swear the Lowe's employees hide when they see us coming.  We are always needing wood cut.  Rachael and I both have saws that we can use at home but it's so much easier for us if they cut the wood for us!!  This picture is from our February craft night but it shows you how much we need for our classes.  


The first thing we had people do when they came to class in March was to brush white paint on their board.  We wanted these to look old and distressed so we had them brush it off with a paper towel to give the wood a distressed look.


The next step was to have each person cut out their stencils for the craft.  We printed SPRING and SUMMER on individual sheets of paper and then had each person cut out their own stencils.  We thought about emailing this to everyone ahead of time but decided just to have them cut them out in class.  We did SPRING in Georgia font size 640 and we did SUMMER in Mongolian Baiti size 500.


After they were cut out everyone added their stencils to the sign with a little tape on the back and traced the letters with pencil.  After the traced their letters in stencil they painted their letters with black paint.    They did one side in class and then took the other stencils home so their side would have time to dry before they flipped it and did the other side.


We printed out Hey and Hello in vinyl lettering using my silhouette machine.  


It was a great night!!  It is STILL snowing in NY but we hope everyone can use their Hello Spring signs soon.


Xoxo
 

Wednesday, February 28, 2018

Crafty Wednesday {monogram cup}


Hello!  The craft I’m going to show you today is so easy to make.  I’ve also gotten SO many compliments on it and orders from a few friends to make more.  Most people know I like to put monograms on everything.  I just love a good monogram.  When  I saw an insulated mug at Walmart I thought it would be perfect for a monogram.  Every day I bring ice tea to work so this cup is perfect for that.  And it was only $10.  I found it in the housewares section in the same aisle as the glasses and plates.


I used my silhouette vinyl cutter to make my monogram.  I have my monogram saved as an image on my  silhouette computer program and I can adjust the image to be bigger or smaller depending on what I’m making. 

I use my silhouette ALL the time for crafts.  I got it two or threee years ago for Christmas. It helps me make big andsmall  projects.  I also use it  to make projects for our crafts nights for Branch and Bloom. I just love it!  For this project I used white glossy permanent vinyl.  I always use oracle vinyl and I get it on amazon.


Here is my finished cup.  I just love easy, cute craft projects.


Happy Wednesday.

Xoxo

Thursday, February 15, 2018

Crafty Wednesday {Mardi Gras and Valentines Decorations}

Happy Valentines Day!!!

Today is my Dad’s birthday.  I know he reads here sometimes-so Happy Birthday Dad.  I wish I was in Illinois so I could celebrate with you ❤️❤️


We don’t do much for Valentines Day. Restaurants are so busy tonight so we are going to stay home and order take out  and I made a heart shaped desert for us.  After dinner at home G and I are going to see the Three Billboards movie.  I’m trying to see all of the movies nominated for Best Picture for the Oscars.  After tonight I have three more to watch-yay!


Since Mardi Gras ended yesterday I made us a King Cake (with Rice Krispie treats) which was SO good.  Ava and I actually ate some for breakfast and then I took the rest to work for my co-workers.


I do very simple decorations for Valentines Day.  For small holidays I decorate the Hutch in our dining room.  It's fun and festive and it's a simple way to celebrate a holiday.  I have had my Valentine Decorations for years.  I didn't get anything new this year I just used things I have used in past years.  


My favorite Valentine decorations are the mailboxes I made for Brock and Ava when they were younger.  When they were younger I would put Valentine Treats for them in the mailboxes.  


This year I turned my Christmas countdown calendar into a Valentine countdown calendar for Ava.  I bought this countdown calendar from my fabulous friend Sabrina at my annual Holiday Market.  


A few years ago I bought a heart garland on Etsy.  I love getting it out every year.


A few months ago I made a vertical planter for our dining room.  I usually have potted plants in it but before Christmas I added some boxwood and pine cones.  For Valentines I added some sparkly hearts to make that little area of our dining room festive.


I hope you and yours have a wonderful Valentine's Day!

Xoxo