
I love, love, love rainbow cookies during the holidays. They are one of my favorite holiday treats during the holidays. For the past couple of years my friend Heather and I have been getting together to make them. They are very time consuming and labor intensive and I’m so thankful Heather and I make them together.


2 1/2 sticks unsalted butter, cut into pieces and softened, plus more for the pans
2 cups all-purpose flour, plus more for the pans
8 ounces almond paste
1 cup sugar
4 large eggs, separated
1/2 teaspoon kosher salt
Red and green food coloring (gel preferred)
1 15 -ounce jar smooth apricot jam
Cooking spray
1 pound bittersweet chocolate, chopped
You'll need three 9-by-12-inch jelly roll pans or rimmed baking sheets to make these layered cookies.
Prep the pans: Position racks in the upper and lower thirds of the oven; preheat to 350 degrees F. Butter and flour three 9-by-12-inch jelly roll pans or rimmed baking sheets and line with parchment paper.
Make the batter: Combine the almond paste and 3/4 cup plus 2 tablespoons sugar in a stand mixer fitted with the paddle attachment. Mix on medium speed until the mixture is in fine crumbles. Beat in 2 1/2 sticks butter, a few pieces at a time, until well combined. Beat in the egg yolks, one at a time, until smooth.
Sift 2 cups flour onto a sheet of parchment and sprinkle the salt on top; add to the mixer bowl and beat until just combined.
In a clean bowl, whisk the egg whites until foamy; while whisking, slowly add the remaining 2 tablespoons sugar and whisk until firm peaks form (or use a hand mixer). Fold about one-third of the egg white mixture into the batter with a rubber spatula, then gently fold in the rest. The batter should be fluffy.
Color the batter: Divide the batter evenly among 3 bowls. Stir enough red food coloring into 1 bowl to make a deep salmon color. Stir enough green food coloring into another bowl to make a medium green color. Leave the third bowl uncolored.
Bake the layers: Transfer the batter to the prepared pans (one pan for each color). Dip an offset spatula in water and spread the batter to the edge of each pan, smoothing the tops. Bake, switching the position of the pans halfway through, until the cakes are cooked through and just beginning to brown around the edges, 8 to 10 minutes. Let cool completely in the pans on wire racks.
Assemble the layers: Spread half of the jam evenly over the green cake layer almost all the way to the edges. Unmold the plain cake layer by inverting it onto another pan or cutting board; peel off the parchment.
Carefully slide the plain layer onto the green layer (use a wide offset spatula to help you, if necessary). Spread the remaining jam on top of the plain layer. Unmold the red cake layer and slide it onto the plain layer.
Cover the cake with plastic wrap and top with one of the empty pans; place several heavy cans on top to weigh down the layers. Refrigerate at least 4 hours or overnight.
Unmold the cake: Remove the cans and plastic wrap. Place a cutting board on top of the cake and flip to unmold it onto the cutting board. Remove the parchment from the top of the green layer.
Trim the cake: Trim the sides with a knife to make straight edges. Spray a wire rack with cooking spray; set the rack over a baking sheet. Carefully slide the cake onto the rack, using a wide offset spatula to help you, if necessary.
Cover in chocolate: Melt the chocolate in a heatproof bowl set over a pan of simmering water; pour over the cake. Dip an offset spatula in the hot water and smooth the top and sides. Let set slightly. Scrape wavy lines into the chocolate with a fork; let cool a few more minutes until the chocolate is mostly set but still slightly tacky.
Cut into pieces: Slide the cake back onto the cutting board. Slice crosswise into 6 strips, then cut each strip into 8 rectangular pieces. For clean edges, dip the knife in warm water and wipe it with a cloth between cuts. Store in an airtight container at room temperature for up to 1 week.
If the lines in the chocolate don't hold their shape, let the chocolate set a little longer and try again.
————————
These cookies freeze beautifully! As a matter of fact I have a Tupperware container full of them in there right now! I took two platefuls of these cookies to two different Christmas parties and I wanted to bring some to Brock but I had NO room in my suitcase so the cookies had to stay in the freezer.
Here are some pictures from our rainbow cookie making day!
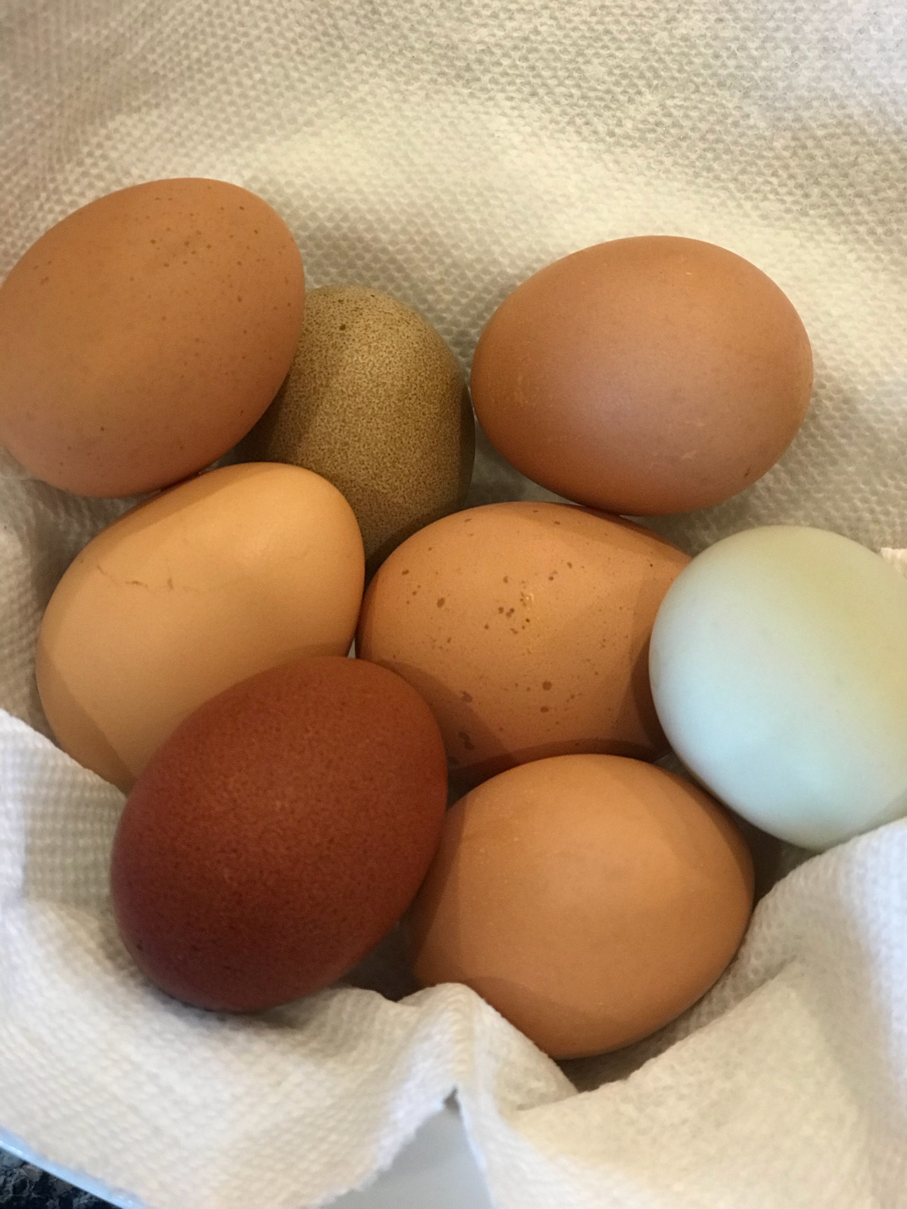
Heather has her own chickens so we used fresh eggs from her chickens! I love farm fresh eggs. We get fresh eggs every Friday from my father in law and they are the best.
You have to sift all the flower for this recipe 🙄. I told you it was time consuming 😂

Thank goodness Heather has a kitchenaid. You could not make this recipe without the kitchenaid because there is so.much.mixing!
Heather still sifting away 😂.


After the dough was mixed we put it into three different bowls and color one green and one red. We left the third one white.

We prepared three big baking sheets with cooking spray and flour for our dough.

The next step was to spread out the dough on the three pans and bake them in the oven. The dough is really thin and doesn’t take too long to bake.

After this step I had to go back to work and Heather finished making our cookies. (Thank you Heather! ❤️) She dropped them off to me when they were completely finished and I put them in the freezer to take to Christmas parties.

These are amazing cookies!
Two days until Christmas!! I can’t wait
Xoxo

0 comments:
Post a Comment